
Hello Westeros!
New battle report, this time a 3 players one: Baelor Blacktyde vs Eldon Estermont vs Jon Snow!
We had played another game the week before, Victarion vs Roose in Greyjoys, but let’s just say the whole game went very fast after one tiny mistake from Eric, bringing Ramsay and Silenced Men in charge distance from Victarion, far on the flank, at the end of round 2.

One devastating charge, a disgusting quantity of free attacks and an Overrun later, and the game ended on round 4 with only Roose and Drowned men left. So let’s just say, Eric took lessons from that game for this next one…

This time, we were joined by a relatively new player, LittleP, who played on TTS but never in real life, so that was a good experience for him. Plus, full painted Night’s Watch!
—
The Lists
Greyjoy: Baelor in Blacktyde Chosen, Asha and Qarl in Ironmakers, Warsworn in Reavers, Reavers, Bowmen, NCUs Beron Blacktyde and Tristifer Botley.
Baratheon: Eldon Estermont in Golden Company Swordsmen, Bronn in Stag Knights, Hedge Knights, Glory Seeker in Champions of the Stag, NCUs Littlefinger and Cortnay Penrose.
Night’s Watch: Jon Snow in Ranger Hunters, Ghost, Recruiter in Conscripts, NW Captain in Sworn Brothers, Coldhands, NCUs Othell Yarwyck, Samwell Tarly and Gilly.
—
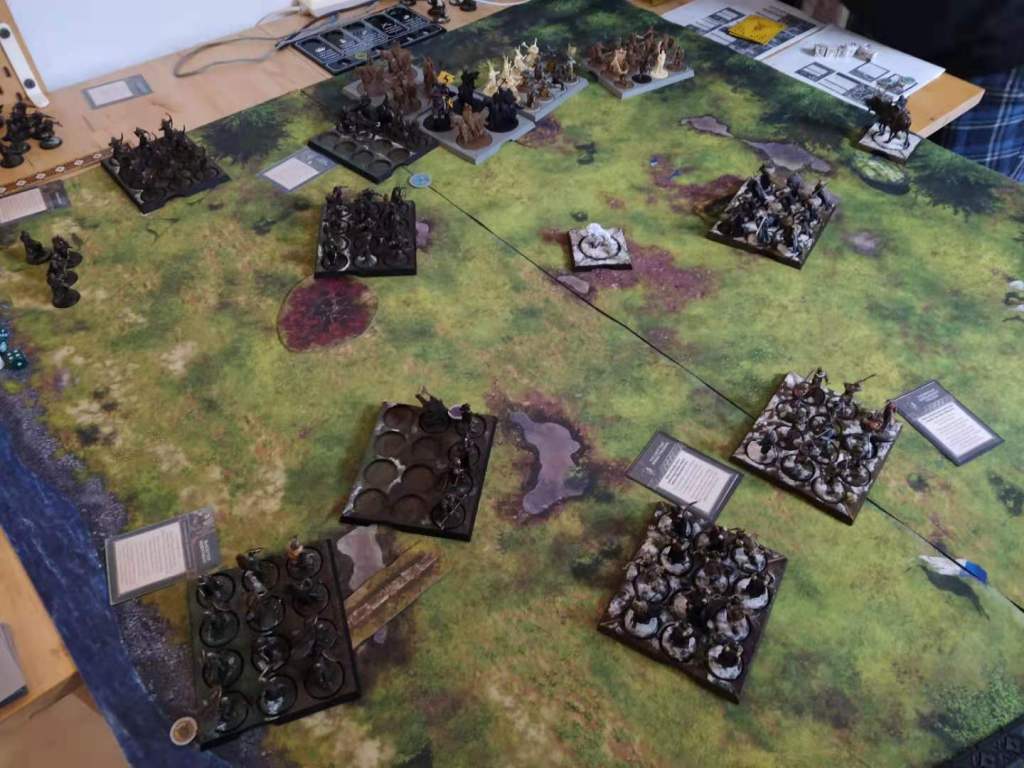
The Battle

As for many games, round 1 went peacefully, every unit moving forward. I made a mistake in moving my reavers on the Baratheon side, pivoting after their march and therefore not leaving enough space for my bowmen to fit in. Big mistake that in hindsight probably cost me a lot. Othell shot his arrows, with a magnificient triple 1 (we then remembered he had 3 more shots due to the number of ranks, so he managed to do 2 wounds in my Ironmakers).

The Baratheon cavalry was on my side, good play from Eric to put them in front of Greyjoys, less easy for me to get pillage. Ghost ran near the center of the battlefield, while Jon Snow and his rangers came closer to my Ironmakers, which clearly was the target, missing pillage tokens.
Round 2 started, and I had to make choices…
With Eldon’s forces staying put in their little square, and the Night’s Watch moving quite slowly towards them, it didn’t seem like the situation was going to escalate quickly on that side of the table, meaning I had to bring the fight to them, as a respectable pirate.
Due to my Reavers blocking the way for my Bowmen to shift, I went for the other option: CHARGE. I went for the Champions, the Hedge Knights being protected by them, but figured with Sundering, I could manage to at least kill 1. Not the best laid plan to be fully honest, but I was counting on the 2 “What is Dead May Never Die” in my hand to surprise him in case things went awry.
Unfortunately, it was a 3 players game. And things went awry on the other side too! I planned to catch Jon and his Hunters in sandwich between my Ironmakers and my Blacktyde Chosen, laying a nice juicy Ironmaker bait, to charge them with Baelor in the flank.
BUT, Ranger Hunters can run away after charging, and I did forget that when planning this nonsense… (NOTE: this is why playing against different factions regularly is a good idea!)
So in the end of round 2, my Ironmakers had taken a charge followed by a range attack, and where left at half their men, after some healing. Outch.
Meanwhile, the reavers on the other side were in a similar posture, with the Champions and the Hedge Knights having massacred half the tray, who only survived thanks to Beron’s influence. The second unit of reavers were positioning themselves to charge the direwolf on the next round, preparing to enjoy a free VP…
Until Ghost ran away next round. Bummer. My wolf pelt…
But first, on the other side of the table, the Reavers are getting pummeled by the cavalry, and I have to spend a “What is dead may never die” to keep them alive. Unfortunately, it means that they are now pretty useless, acting as a screen to protect my archers.
Priorities just shifted, with the Ranger Hunters needing to be done for. So, Ironmakers charge! And just like that, Qarl one-shots Jon Snow!
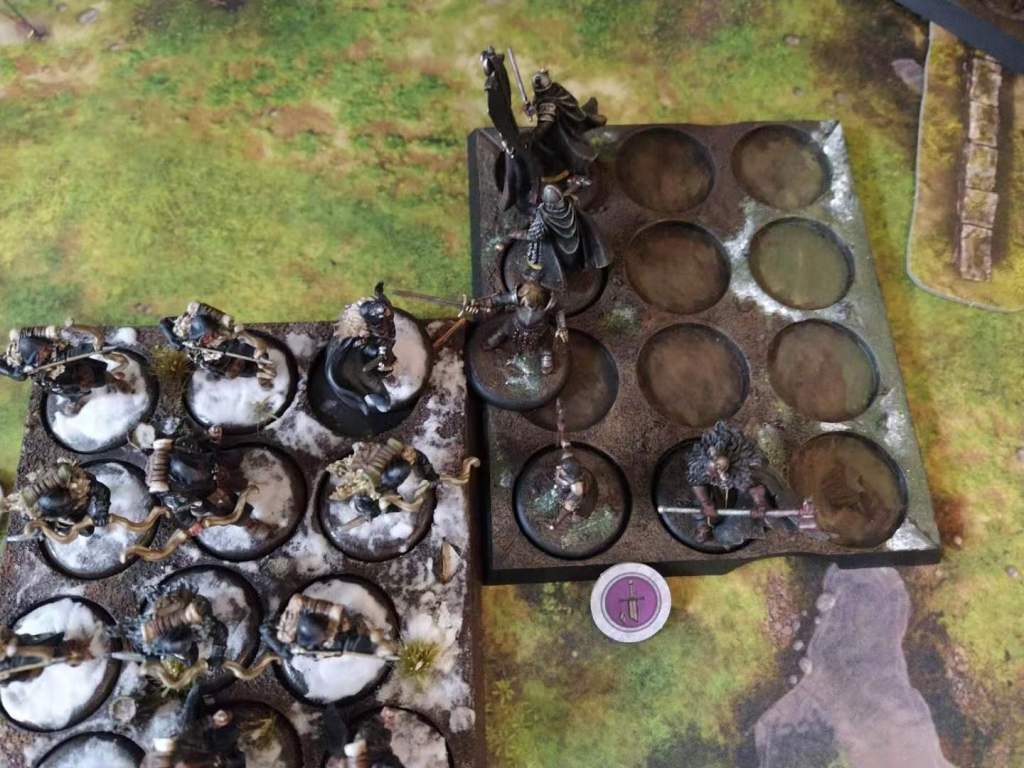
The attack was pretty brutal, unfortunately not enough to take out 2 ranks and get 2 pillages… which would have been very useful for the riposte.
The Ranger Hunters, even with their leader’s death, or maybe because of it, are impressingly brutal, and I need to spend my second “What is dead may never die” to make Asha survive. Not a great round for the Greyjoys!

The second reavers unit, with no other target in sight, charges the Champions of the Stag to keep a small momentum, but barely make a scratch in the heavy armors. Those guys are a walking wall! To make things worse, the reborn unit now dies for real, brought down by the Hedge Knights.
On the far end of the battlefield, Coldhands is trying to outmaneuver the Baratheon infantry, supported by the Sworn Brothers. Unfortunately for him, the Golden Company is no stranger to giant beasts, and tames him quite fast. But…

Round 4, and he comes back in their rear once again!
3 “duels” take place on the table: Reavers vs Champions of the Stag, Coldhands vs Golden Company vs Sworn Brothers, and Ironmakers vs Ranger Hunters.

The heavy knights are not waiting, and cut down the reavers in front of them. They then surge forth closer to the center of the table, ready for impending Night’s Watch assaults.
Revenge is apparently a dish served hot in the Night’s Watch, and Asha and her Ironmakers get finally cut down by vengeful Rangers, who then ignore the Greyjoys and start walking their way towards the Baratheons.
The fight is still going strong between the Golden Company and the Sworn Brothers, and unfortunately for him, Coldhands is brought down once again, the Company healing insane amounts thanks to Cortnay and some Baratheon Justice…

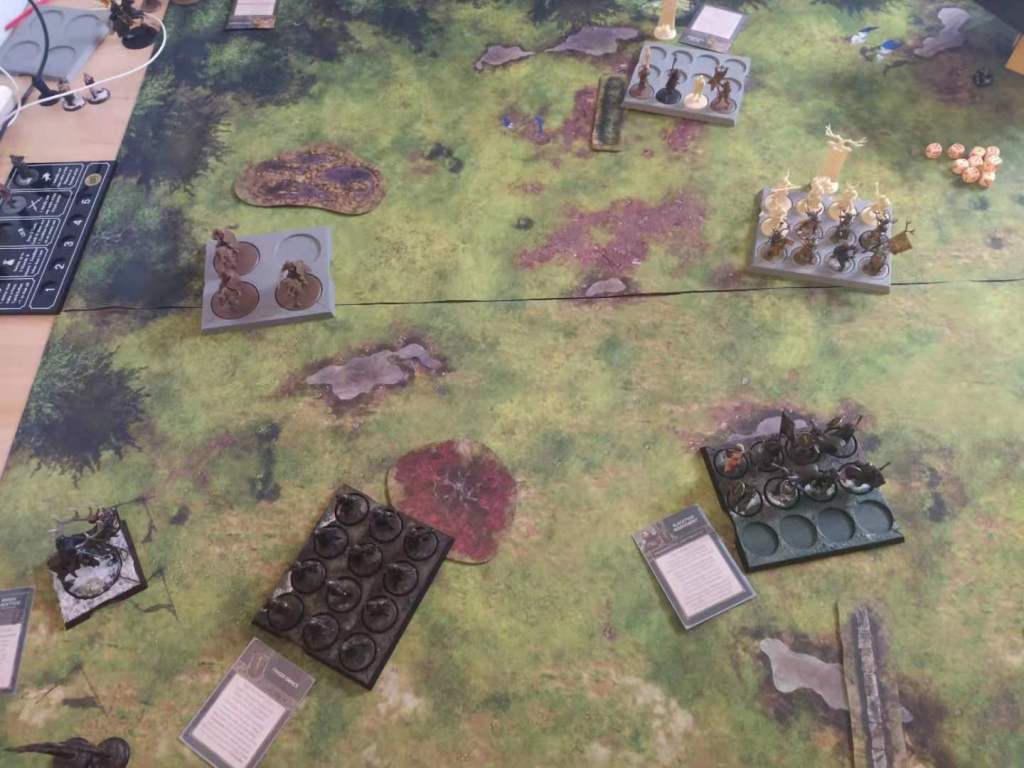
And now, let’s charge the wolf! Baelor and his Blacktyde Chosen charge the beast, making a whooping… 3 wounds. Brilliant.
Fuelled by rage, Baelor manages to put in a free attack to slaughter Ghost, earning a VP and going back to his original objective. Let them butcher each other for a while, the krakens need a bit of resting!
The Champions of the Stag then meet the Ranger Hunters, helping the krakens breathe for a while.

Nonetheless, the Bowmen have in mind to avenge their brothers and move slowly towards the center…
Round 5, and I’m a bit confused with the order of events, but in summary…
The Champions of the Stag annihilate the Ranger Hunters.
Coldhands, well, dies again, after charging once again the Golden Company and taking their riposte attack.
The Champions are charged by Baelor and his Chosen on the flank, getting seriously wounded.

The PAIN TRAIN: the charge of the Stag Knights in the Sworn Brothers. Well, let’s just say that the attack was… violent. No more Sworn Brothers.

The Ironborn bowmen shoot in the rear of the Champions, taking them down to 3 wounds.
Aaaand Tristifer ends up on the Crown, for a Crown bomb killing the Champions!
Round 6, Coldhands comes back on the Ironborn side this time, behind the Bowmen. Probably tired of getting hammered.
The Stag Knights keep on their killing spree, this time focusing on the poor NW Conscripts, while Baelor witnesses this and goes back on his toes to his objective.

The last objectives are taken by the Golden Company and the Hedge Knights, ending the game on a Baratheon victory!
End result: 10 (B) -8 (GJ) -2 (NW)
—
Conclusions
So first, my list was definitely not optimal, but was basically created through laziness: I just added the Ironmakers and characters to my bag in which I had my Victarion’s list from the previous week, as I had been too busy/lazy to remove them… Yeah, it’s summer, it’s hot, and fatigue got the better of me.
In 3 players, BRING ERIK IRONMAKER.
I find it quite easy to avoid Erik in normal games, you can prioritize some units to get pillage first and juggle between them. With 3 players however, attacking and getting attacked on both sides makes it very tough to choose where to focus your attack. Add to this one side made of cavalry, and pillage tokens are NOT coming easily.
Tristifer was a bit disappointing, I never had a great opportunity to use his first ability, and with Cortnay in the opponent side, it limited his use even more. I will keep him for Dark Wings Dark Words and Winds of Winter games, in which he could be more influential.
The Blacktyde Chosen are getting more and more points for me, they are quite reliable offensive-wise, and with Baelor’s cards can be pretty strong. The fact that they don’t rely on pillage and are straight-up good is a nice change from other units, I might use them more often.
My biggest mistake happened at the start with my bowmen getting stupidly stuck, but even then, it mostly didn’t go really well for me, even though I ended up grabbing lots of VPs thanks to Baelor and his unit.
Eric played really well in “turtle-bunker” mode, quite appropriately in regards to Eldon’s sigil, keeping the Stag Knights until the last minute for a full rampage, which was pretty fun to watch (as the 3rd unconcerned player obviously, I fear Little P and his Sworn Bros did not enjoy it as much…), and Eldon is still one of the strongest commanders around.
He even managed to use the card when killing an attachment, which is usually quite hard to put on the table, so hats off!

Champions of the Stag keep proving their worth, both defensively and offensively: I thought Sundering would at least tear them down a bit, but nope, not working, only flank or rear attacks worked (btw, it’s the second time I use Ironborn bowmen to hit Champions in the rear, really fun to do!), and offensively, they are a very able token machine, and their Critical blow can be quite efficient. Definitely the MVPs of the game in terms of damage/resilience!
Ranger Hunters are a freaking pain, they can dish out an insane amount of attacks, making them really hard to tackle (I was quite relieved when they left my side to go next to the Baratheons, I’ll admit…). I was very happy with Qarl assassinating Jon Snow (small victories, yay!), but the unit in itself was very tough.
It’s always weird to fight Night’s Watch, it’s a real uphill battle, but at the same time very good in teaching you some lessons for future games.
I think the main mistake for Little P was to focus on Eldon’s Golden Company unit, with Hardened they never had a chance, and his Sworn Brothers could have been more useful elsewhere. That was 2 activations per round and it barely scratched the Golden Company, which was a bit sad to witness…
Coldhands works well as a nuisance, but he really gives a lot of vps to the opponent. Unfortunately for me, he only came my way at the end when I couldn’t hit him…
I think it was a good first “real” battle for Little P, showing him a different perspective and that objectives are very important in this game. He played really well on my side of the table, the Baratheon side was a bit tougher to tackle unfortunately, these walking cans are hard to pierce through!
—
Hope you enjoyed the batrep, next time, I’ll bring Lannisters again, I’m in a red and gold painting frenzy these days, so will need to put the new ones on the table!
Grob’

